Welcome to the most important first step on your Savvy Local journey! This guide will walk you through the two crucial tasks to get your account ready for business: setting up your payments and completing your initial profile.
Completing this checklist should only take about 5-10 minutes. Let’s get started.
✅ Step 1: Set Up Your Wallet to Get Paid
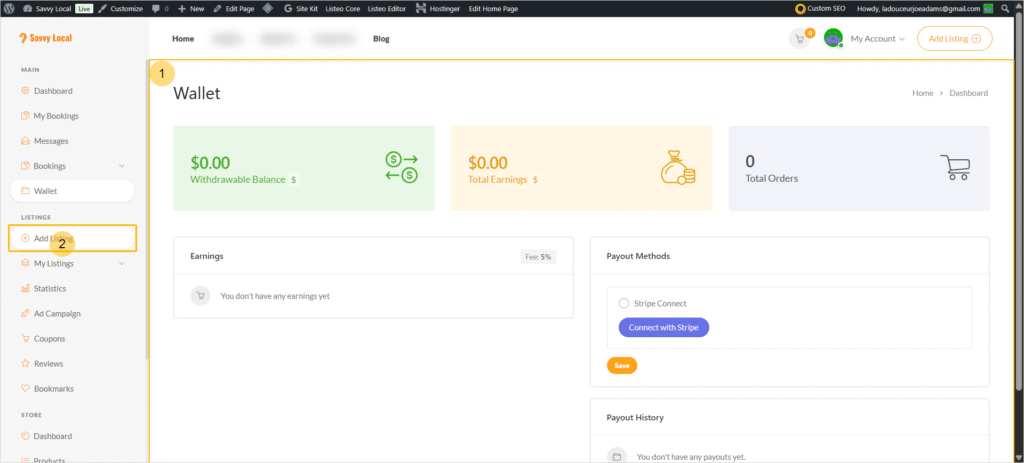
First, let’s make sure you can receive payments for all the new customers you’re about to get. We process all payouts securely through our partner, Stripe, a global leader in online payments.
- Navigate to Your Wallet: From your main Partner Dashboard, look for and click on the “Wallet” tab in the sidebar menu.
- Connect with Stripe: Inside your Wallet, you will see a prominent button that says “Connect with Stripe”. Click it.
- Complete Stripe Onboarding: You will be redirected to a secure Stripe page. Here, you will link your bank account and provide your business details. This is a secure, one-time setup that ensures your earnings are deposited directly and safely.
A Quick Note on Commissions:
Once you are connected, you are ready to earn! As a Savvy Local Partner, our model is simple and risk-free. We only make money when you do. Based on your plan, we will automatically deduct our commission from each deal a customer redeems:
- Early Adopter Rate: 5% commission. A special “thank you” for being one of our foundational partners!
- Standard Rate: 10% commission.
The remaining 90-95% of the sale is all yours and will be paid out according to the schedule in your Wallet.
✅ Step 2: Complete Your Basic Profile
Now that payments are sorted, let’s add your brand’s identity. Your logo and business description are the first things customers will see.
- Go to “My Profile”: From your Partner Dashboard menu, click on “My Profile”.
- Upload Your Logo: Look for the logo or profile picture section and upload a high-quality version of your business logo. This will appear on your main profile and on the deals you create.
- Write Your “About Me”: Find the “About Me” or “Business Description” text box. This is your chance to tell your story! Write a few sentences about what your business does, what makes you unique, and why customers love you.
And that’s it for now! You’ve completed the essential setup. By connecting Stripe and adding your basic profile information, you’ve laid the groundwork for a successful partnership.
In the next phase, we’ll dive deeper into building out your full business listing, but for now, you’re ready for a tour of your new command center.
➡️ Next Step: A Guided Tour of Your Partner Dashboard