Welcome to the fun part! This guide will walk you through creating your very first Service-Based Deal from start to finish.
A Service-Based Deal is the perfect option if your business relies on customers booking a specific date and time for an appointment. Think of businesses like salons, consultants, studios, massage therapists, or repair services.
Ready to build your deal? Let’s begin.
Step 1: Basic Information
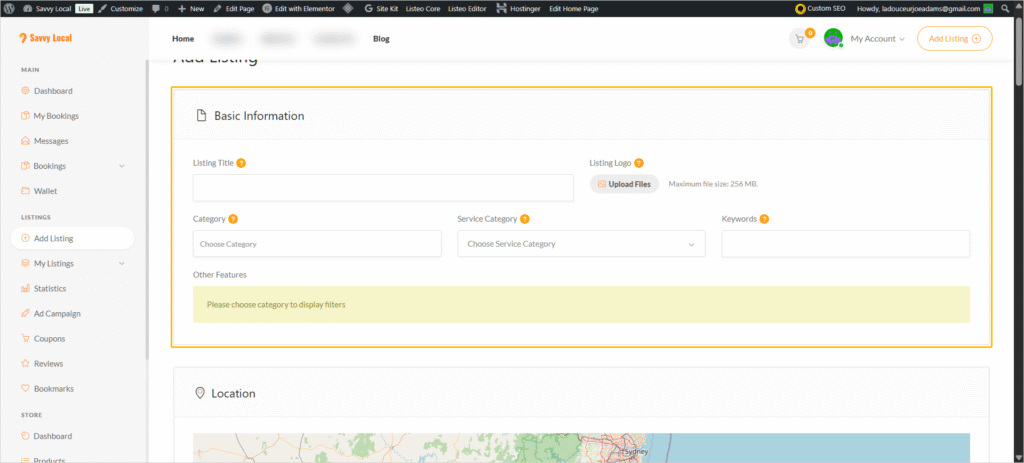
First, navigate to Listings → Add Listing and select the “Service” option. This will take you to the deal creation page.
- Listing Title: This is your short, compelling headline. Make it exciting and clear! (e.g., “60-Minute Deep Tissue Massage with Hot Stones” or “Deluxe Manicure & Pedicure Package”).
- Listing Logo: Upload your business logo here.
- Category: Choose the category that best fits your deal. You can choose from:
Automotive,Education,Entertainment,Food and Drinks,Health and Wellness,Home and Garden,Services, andShopping.
- Keywords: Don’t worry about this section! To optimize your deal for search, we will take care of the keywords for you upon submission for approval. Just leave this part blank.
Step 2: Location

Help customers find you easily.
- Business Address: Enter your full business address, including the street, city, state, and zip code. Our smart map tool will automatically add a pin for your location.
- Friendly Address: Add your City and State here for a cleaner display (e.g., Rexburg, Idaho).
- Region: Choose your region from the dropdown menu.
Step 3: Gallery
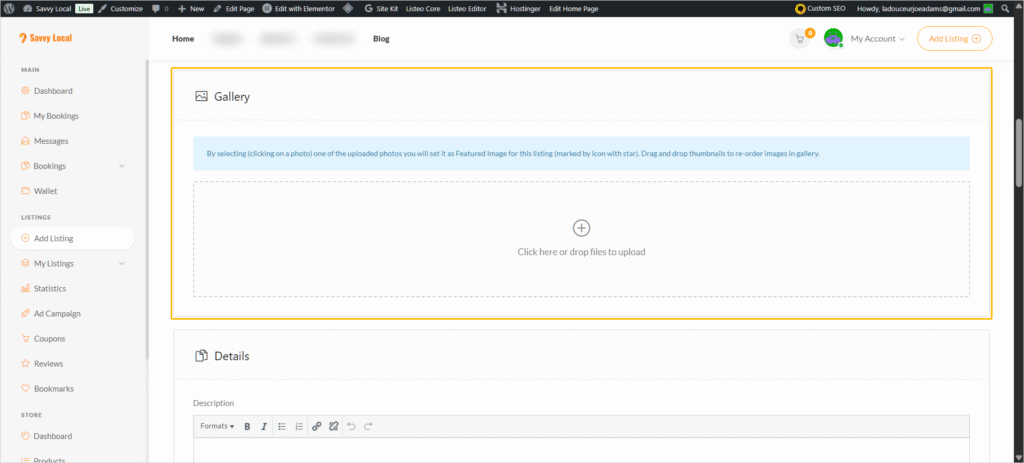
Showcase your service!
- Images: Upload 2 to 4 high-quality images of your service. Make sure the photos show exactly what the customer will get with the deal. This is your chance to make a great first impression.
Step 4: Details & Media
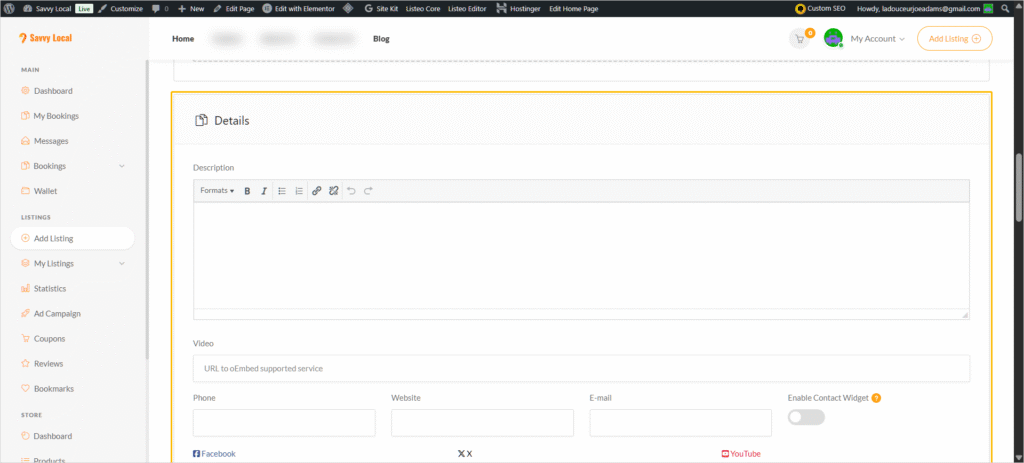
This is where you’ll provide the specifics of your offer.
- Description: Please follow this template for clarity and impact:
- Start with a short, catchy headline (can be the same as your Listing Title).
- On the next line, add the Expiration Date of your deal in bold.
- After that, describe your deal as thoroughly as you can. What’s included? What are the benefits? What can a customer expect? We will make modifications and adjustments as needed during the approval process to ensure it shines.
- YouTube Video: Do you have a video showcasing your business or this specific service? Add the YouTube URL here!
- ⭐ Don’t have a video? We’ve got you covered! As a Savvy Local partner, we offer a complimentary service where we will come to your establishment and film a quick, professional video for your deal. You can then use this content for your own social media or marketing efforts! We will contact you beforehand during the approval process to schedule a time to film.
- Optional Contact Info: The rest of the fields in this section are optional, but we recommend filling them out to give customers more ways to connect with you. This includes Phone, Website, Email, and links for Facebook, X (Twitter), YouTube, Instagram, and more.
Step 5: Booking Settings
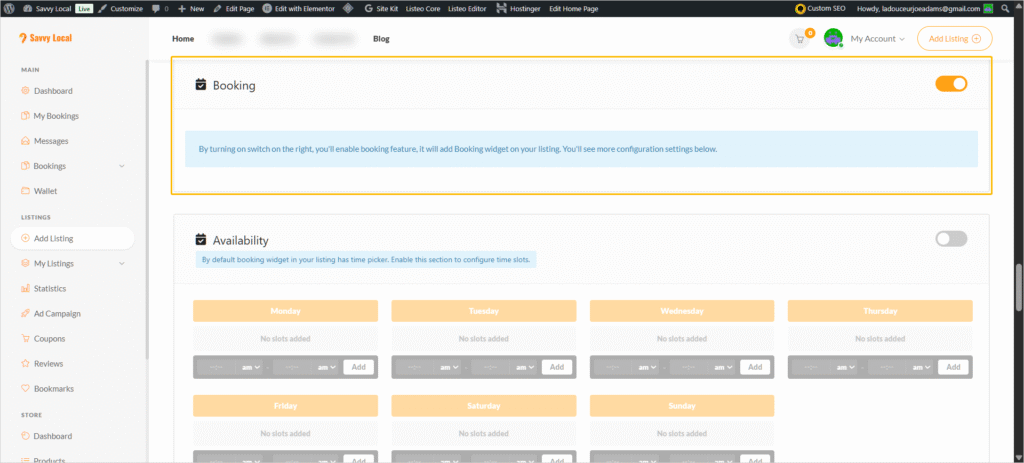
This is the core of your Service-Based Deal.
- Activate Booking: Find the “Booking” toggle and switch it to “Active”.
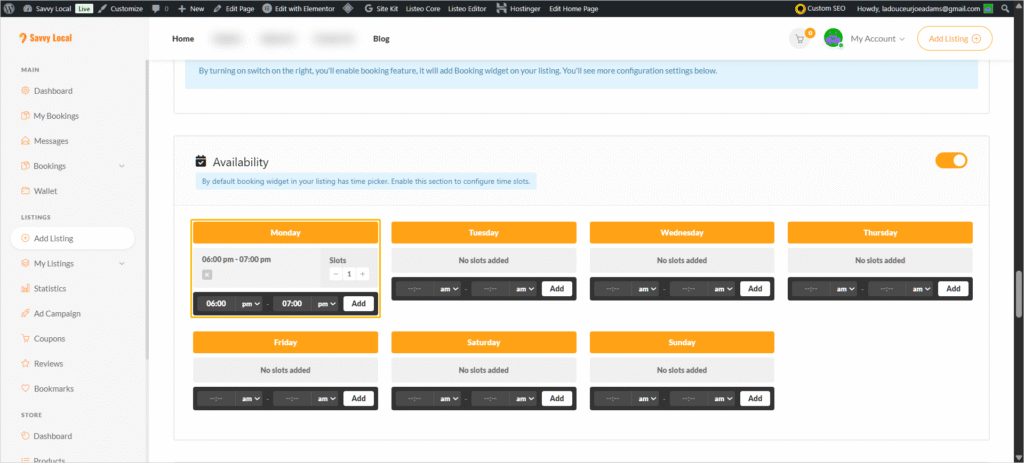
- Enable Availability: A new toggle for “Availability” will appear. Switch this on too. This allows you to set specific time slots for appointments. If you prefer customers to book a day without a specific time, you can leave this off.
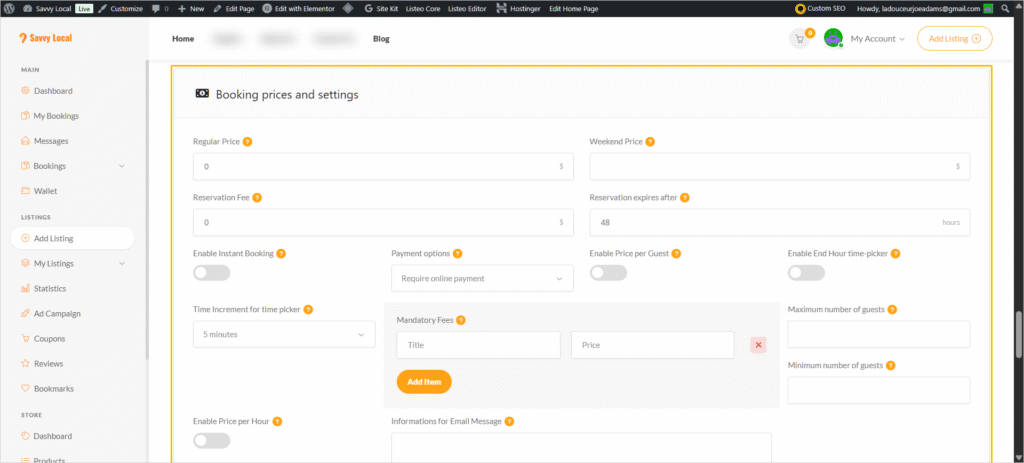
- Booking Prices and Settings:
- Price: Enter the special deal price for your service. You can also add your “Regular Price” to show customers the value they’re getting, and an optional “Weekend Price” if your rates change.
- Pricing Tools: Need help with your price? Use our built-in tools!
- Margin Master: A simple tool to help you optimize your pricing strategy and maximize potential profits.
- Profit Pro: Your smart business companion for calculating real profit margins. It helps you factor in fees and costs to make data-driven pricing decisions.
- Optional Settings: You can add a “Reservation Fee” and set an expiry time for reservations if that fits your business model. You can also Enable Instant Booking if you want to automatically approve appointments without reviewing them first.
- Information for Email Message: Write a heartfelt, custom message here. Your customer will receive this in their confirmation email after they book with you. It’s a great place to say thank you and provide any final instructions.
Step 6: Set Your Availability
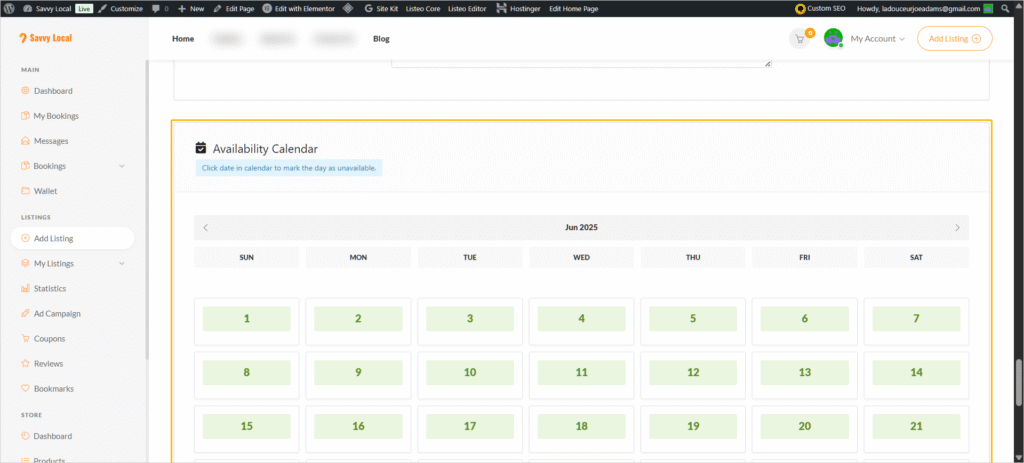
At the bottom of the page, you’ll see a calendar. Simply click on the days you are NOT available. Those days will turn red, and customers will not be able to book them. (Don’t worry, customers will not see the red color, they will just see the day as unavailable).
Step 7: Preview and Submit
You’re at the finish line!
- Click the “Preview” button to see what your deal will look like to customers.
- If you like what you see, click “Submit for Approval”.
Our team will review your submission, which may take 24 to 48 hours (usually less than 24 hours if everything looks good). We’ll handle the keywords and contact you about the video if needed!
If you have any questions during this process, please email us at support@mysavvylocal.com.
What’s Next?
Great job! You’ve learned how to create a deal for your service-based business. If you also offer events or deals that don’t require booking, check out our next guide.
➡️ Next Step: How to Create Your First Event-Based Deal